DIY Lorax Costume

Standard
DIY Lorax Costume

Our family went with a Dr. Seuss theme for Halloween this year. My husband’s pick was the Lorax and my job was to come up with a DIY costume for him. I had come across a picture that linked to a blog of  a great and easy idea. The blog didn’t have a tutorial, but I figured I could recreate it and share how I did it here. The project is super simple and only requires a few items.

Items needed:

Foam sheet in yellow

Yellow or orange sunglasses

Glue gun with clear glue stick

Scissors

Paper and Pencil.  

Step 1: On a piece of paper I did a rough draft of how large I was going to make his mustache and eyebrows. There is a  hole made from the top of the mustache and the nose piece from the sunglasses. The only tricky part  was making sure my husband’s nose fit in the hole and  the mustache wasn’t too high and bothering him.Image

Step 2: Once I had the perfect size on paper, I traced it on the yellow foam sheet and cut it out. Image

Step 3:  I got lucky and found cheap $6 yellow sunglasses at our party store. In this step, carefully pop out the lenses of the sunglasses. Now you are ready to glue on the foam mustache and eyebrows. The nice thing about working with a glue gun is if your placement is off by a little you can wait until it dries peel it off and re-glue it.Image

AND DONE! Hope your Lorax inspired sunglasses turn out great! We got a lot of attention at the Halloween fair with this costume 🙂  Image

Image

DIY Monogram

Standard
DIY Monogram

This post goes along with my https://blondieandcurls.wordpress.com/2013/10/30/diy-tote-bag/  . I wanted to personalize the girls’ Trick-or-Treat Bags with the same fabric I used for the straps. This was my first attempt at doing this and I think it turned out pretty marvelous.

DIY Monogram

You will need: 

Fabric

Rotary cutter and mat or very sharp scissors

Print out of your letter in a  large thick font

Fabric glue

Sewing machine

Ruler *optional

Step 1: Find a nice thick font on your computer and figure out how big you would like it for the project you’re working on. I ended up typing in a larger font number in the window because the largest (size 72) in the drop down menu wasn’t big enough. Print your letter and cut it out.

Image Image

Step 2: Use the letter you cut out as a template to cut your fabric piece. I got lucky and both my girls have rotary cutter friendly letters, all straight lines no curves. I folded the “H” in half to make the center bar easier to cut. You should have near perfect fabric letters once you’re done.

ImageImage

Step 3: Place your letter on the item you will be sewing it on to determine final placement. You can use a ruler if you are OCD about equal sides and being centered. I used fabric glue to hold my letter in place. When applying the glue you don’t have to use a lot and  just glue the center of the letter instead of going all the way to to edges. This is because when it dries you don’t want to have a problem with your sewing needle getting through the fabric and glue. I also put a piece of cardboard behind the layer of fabric I am sewing on to because some of the glue goes through and if you are working with a tote type item you don’t want the glue to stick the insides together.  Let the glue dry for about a 1/2 hour or more if needed and remove the cardboard.

Image

Step 4: Now you are ready to sew! I used a zig-zag stitch and messed with the settings on a scrap piece of fabric first. The following picture shows the settings I went with for this project. Once you have that part decided you can start sewing. It can be tricky when working with a finished tote. Just make sure to keep checking that you aren’t sewing the tote bag together and you are just sewing the letter on one layer of fabric.  Also remember to take your time and hold your fabric tight to make sure it isn’t puckering. Once you come around to the point were you started go passed a couple stitches and back stitch. Cut your thread and you are done!

ImageImage  

Here are my finished products ~>

DIY Tote Bag

Standard
DIY Tote Bag

Hello all! It’s been a crazy hectic week here. I’ve trying to get all our Halloween stuff together and with Littlest’s 2nd tooth coming in it’s been tough finding time to blog. Never fear, she has to sleep sometime and I can run on fumes to bring you this tutorial 😉

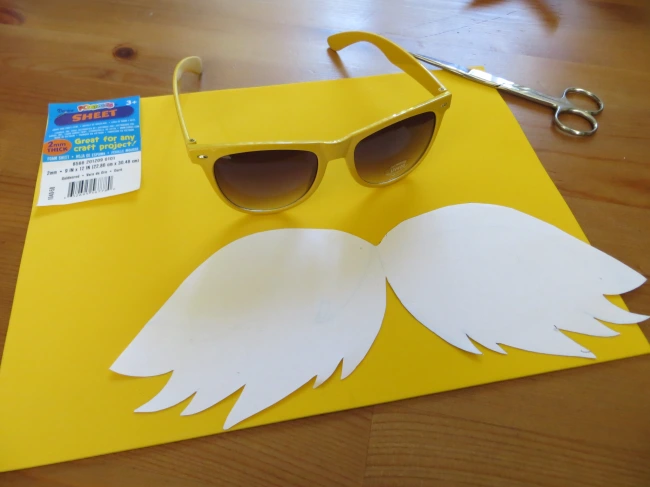
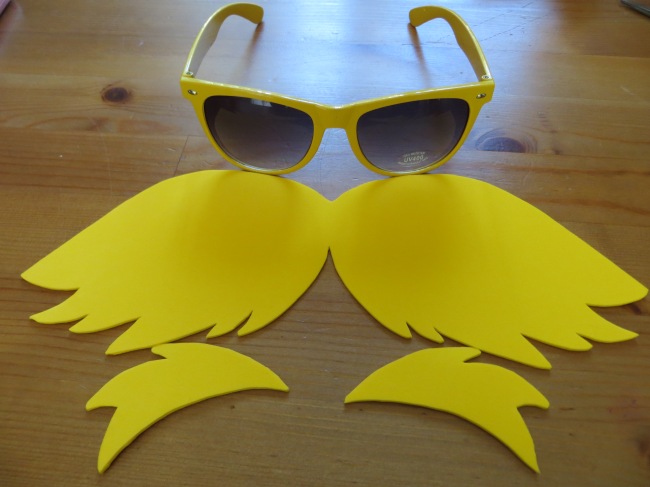
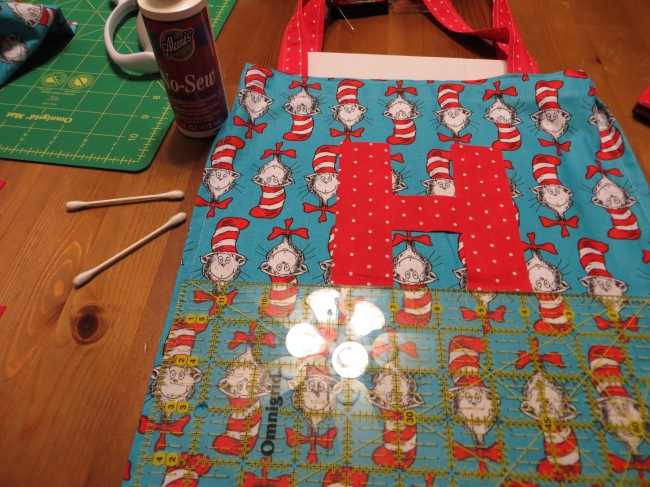
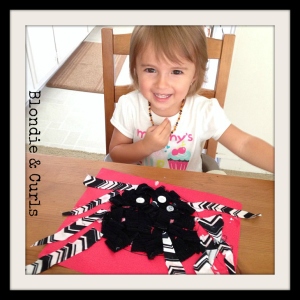
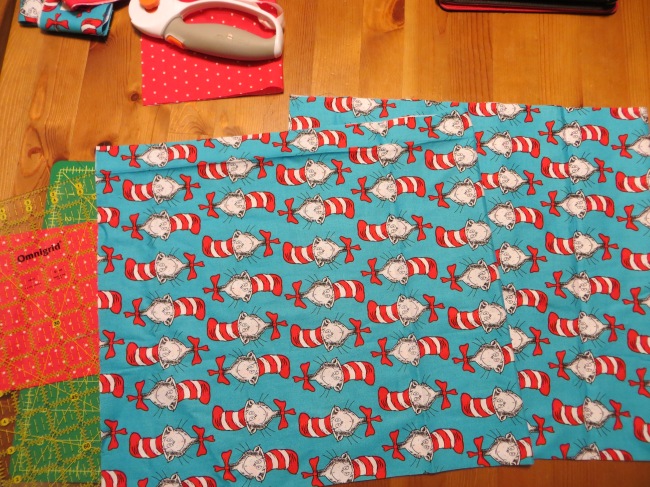
Our family decided on a Dr. Seuss theme for Halloween this year, so the girls are going to be Thing 1 and Thing 2 from The Cat in the Hat  book. I wanted to personalize their costumes as much as possible to get a home-made feel, but hopefully not the cheesy kind of home-made feel.  While brainstorming I came up with the idea of making their Trick-or-treat bags with fun fabric that went with our theme.  I came across some great Cat in the Hat fabric at our local craft store and used it to add pizzazz to their tutus and to make their personalized trick-or-treat tote bags. What’s nice about this is you can really use them for anything and make them as large or small as you like.

*DIY Tote Bag*

  • You will need about a half yard of fabric in the main print and a small amount of secondary matching fabric if you want to make it even cuter.
  • rotary cutter
  • cutting mat
  • sewing machine
  • thread
  • pins
  • Iron

*You do not absolutely need a rotary cutter and mat, but it will make it a lot easier.

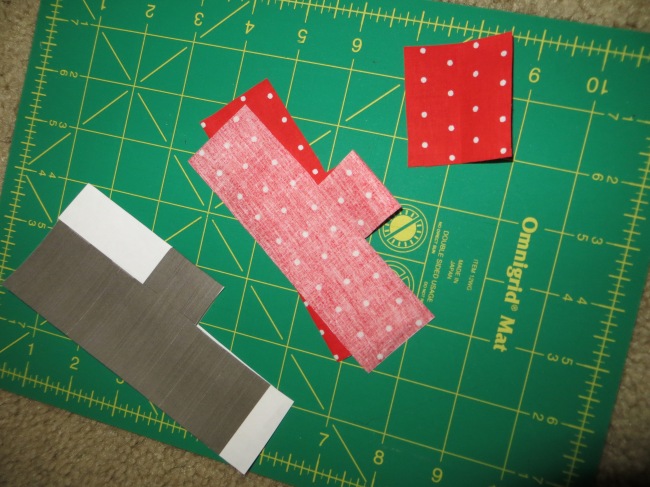
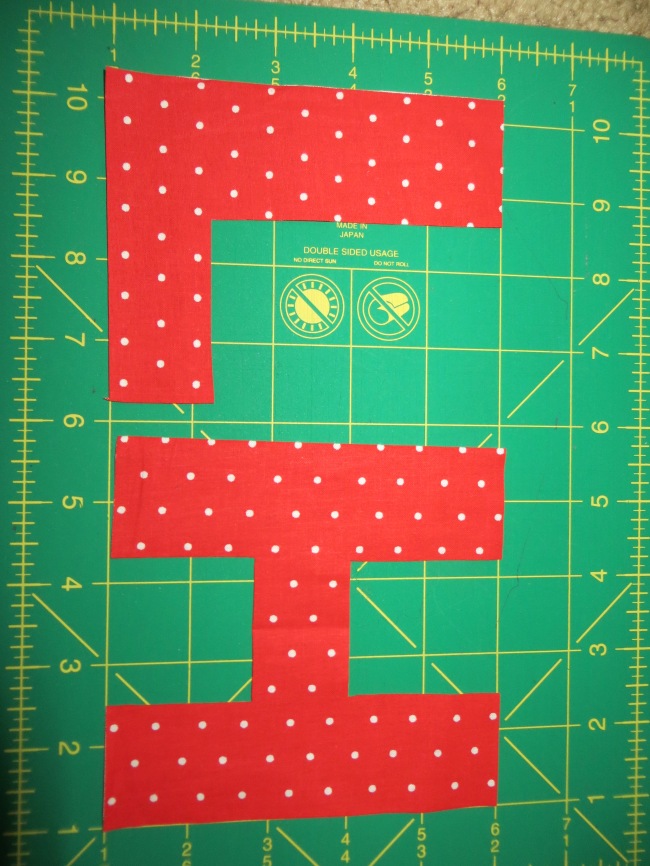
*Optional- If you want to add the DIY monogram you will need fabric glue (THIS PART WILL BE IN A LATER POST)

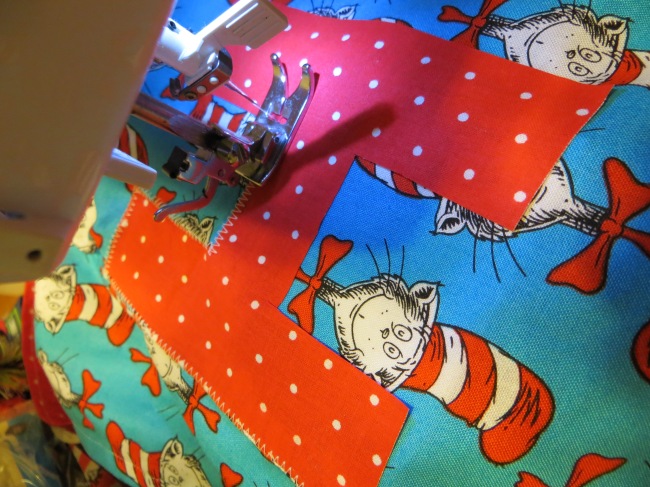
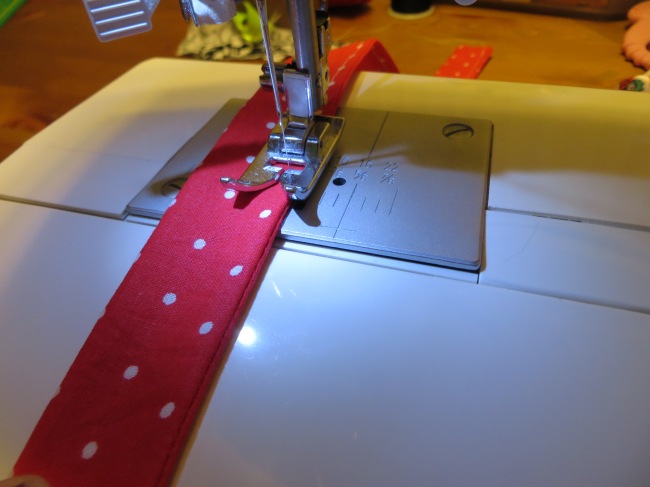
Part 1~Straps:  If you decided on a secondary fabric print, this would be the time to get it ready. You won’t be needing a lot of this fabric, so one of those quarter sized bundles they sell may work great. You can really make the straps as long and thick as you like, but for ours I measured them to be about 22 inches long by 2 1/2 inches wide. In the end they were 1 inch thick. To make these you fold it in half so the right sides (the print side) are touching and sew that long edge so you end up with a tube. You can see in the pic I used the edge of the foot as a guide to how close to the edge of the fabric to sew.

Image

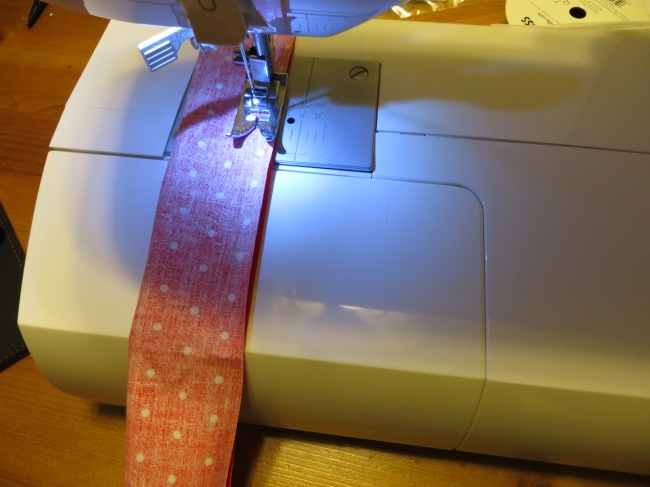
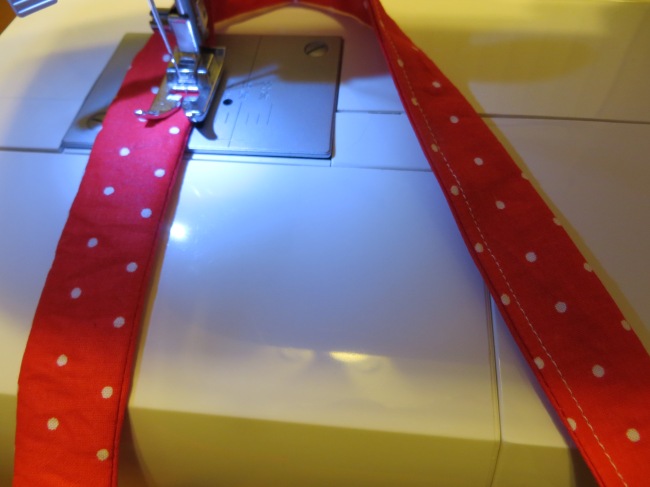
Then you turn the tube inside-out so your print is showing and the stitch is inside the tube. You can Iron them flat at this point because I’m sure they got scrunched in the flipping inside-out process. Now to give them a finished look sew a top stitch along both sides.

ImageImage

Looks good huh? 😉  put them aside and start the bag part now.

Part 2~ Bag

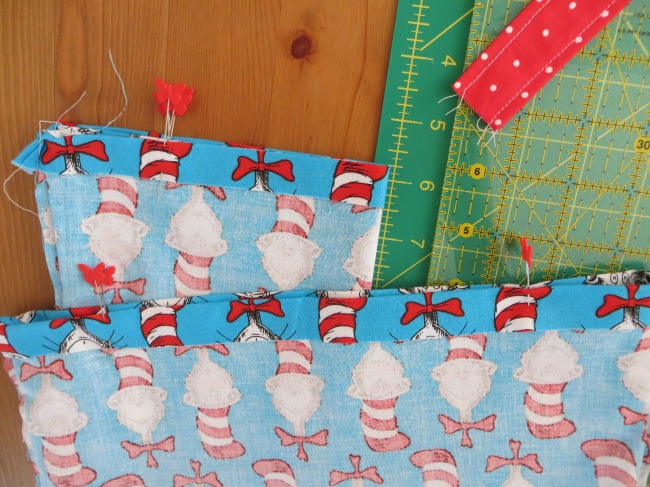
Step 1: Figure out how large you want your bag to be. I would say ours turned out to be average tote size measuring 13 inches tall and 12 inches wide. The print used in this case needed to be sewn so that the large piece of fabric was folded along the the bottom of the bag. This was because I wanted the faces going vertically. Start with a large rectangle piece by doubling the height you want the bag to be PLUS add about 3 inches (for folding in the top near the opening) and the width as wide as you want PLUS 2 inches. Now fold this in half with right sides together. Here are mine folded in half with the print showing.

Image

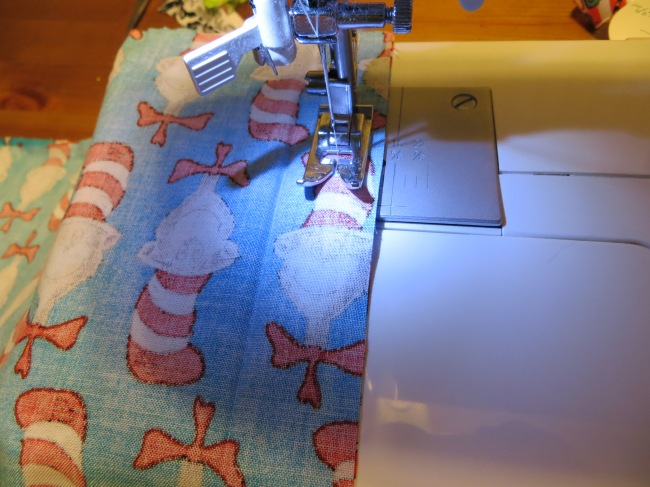
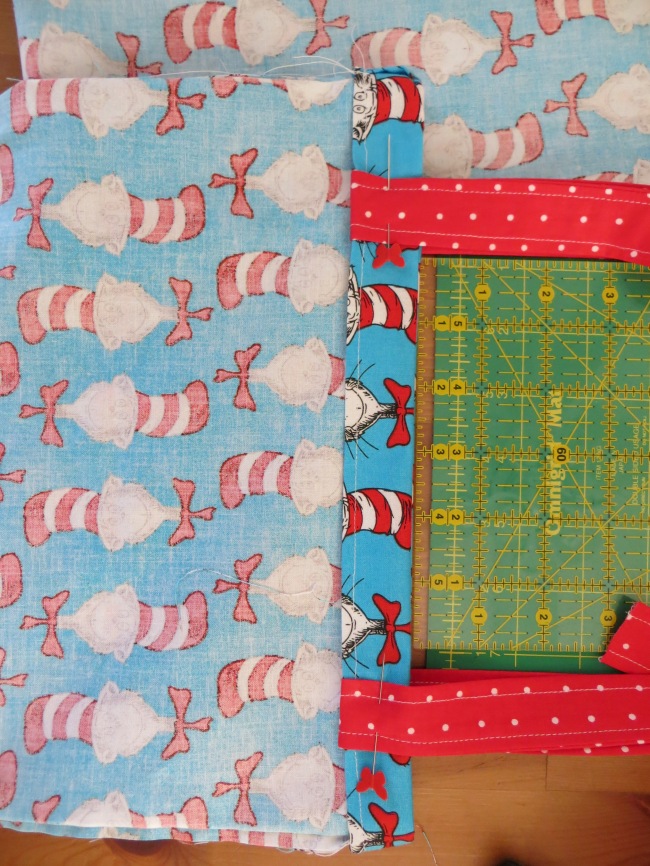
Next, sew from top to bottom along what will be the side of the bag. Do this for both sides.  *Check out my fabric placement on the measuring plate to give you an idea of how far in I started the stitch* Next, I turned the bag right-side out and sewed a top stitch on the edges of the sides to give it a finished look and increase durability. Then turn the bag inside out again for the remainder of the steps.

Image

Step 2: Fold down the top (opening) of the bag about 1 inch. It helps to iron it down at this point. Next, fold the bag in half and decide where you want your straps to be placed. I did about 1 1/4 inch from the side seam. Place pins in the top of the crease right on top of each other. Once you unfold the bag you will get a better idea of the strap placement so you can keep it or change it before you go further.

 Image

Step 3: Here is where I made a boo boo, but it ended up ok and you will see why later, BUT the way I have the straps pinned the pic is upside down. Instead of having the strap end along the crease, pin it so that it lines up with the raw edge of the fold. If you don’t get what I mean it’s ok because it works itself out in the end.

Image

Step 4: Sew all the way around the top of the bag along the crease. Try to get pretty close to the edge.

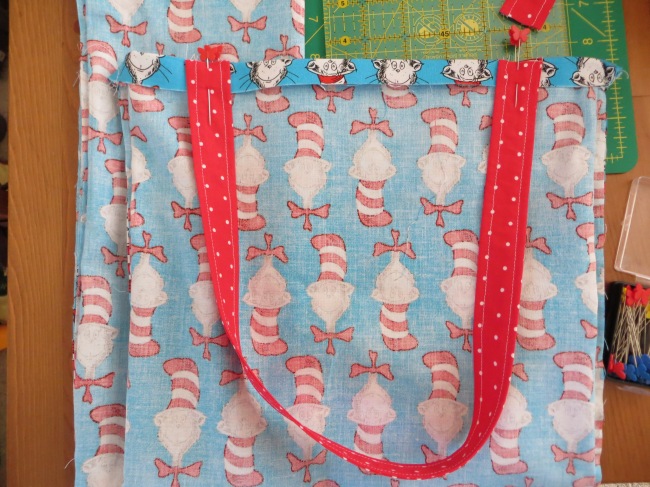
Step 5: Fold the top down 1 inch again (last time I promise). Now you will have to fold the straps up in place and iron and then pin them down like in the picture.

Image

Step 6: Sew all the way around again near the top of the bag to get the straps in their final position. You want this stitch to be pretty close to the edge as well.

Step 7: To add a great finished look you can do a top stitch below the one you just did. It will make the opening more durable too.

Image

Here are the finished products! In my next post I will share a tutorial on adding a personalized fabric monogram using a regular sewing machine. Don’t forget to check it out 🙂

6 Simple Halloween Activities for Toddlers

Standard
6 Simple Halloween Activities for Toddlers

Here are 6 easy Halloween related toddler activities we have done this month.

1. Pumpkin decorating with stickers: Our 2 year old is in love with Toy Story these days and we have mountains of stickers in our collection. This was a quick, fun, and CLEAN activity we did together while Littlest Curls was taking an afternoon nap. Peeling and placing the smaller stickers is great for developing fine motor skills. She had fun and was very proud of the Toy Story Pumpkin she decorated herself.

ImageImageImageImage
2. Ghost Feet: I have to admit that I have an obsession with baby feet. For that reason, we have been doing hand and foot prints with the girls on every occasion I can think of (holidays, 3 months 6 months 9 months 1 year, Father’s and Mother’s day, etc). This is a fun way to gauge growth too. I’m also obsessed with comparing footprints haha, feel free to judge at anytime ;).  Here is *my super secret simple trick for getting almost perfect prints each time* ……… Paint your kiddos’ hand/foot with the paint using a sponge brush or large paint brush. I used to just pour the paint on a plate and dip my kid’s hand/foot in it and go straight to the paper. This method is a no no because the paint will be uneven in some areas and you won’t get a clean print. Having a non-squirmy kiddo that is willing to have their body painted is always a plus too.

Image
Image

3. Spider handprint Art: This is fun to add on the wall next to your painted ghost footprints. They are fairly easy to create because it’s all about hand placement. In our project, I put the girls’ hands closer to the corner of the sheet of paper so that I could add a spider web with crayon after the paint dried. If you are feeling more artsy feel free to paint a spider web as a background. You could also make more than one spider on the page if you wanted. Maybe one on a web and one hanging from a string? Get creative with white yarn too!

IMG_6134 IMG_6137

4. Pumpkin ‘Fist’ Patch: If you aren’t sick of paint yet 😉  Give this one a shot! This turns out pretty neat if you have toddler that is willing to make a fist (and keep a fist) to stamp in paint. You just pour paint on a plate and use their hand as stamp. I didn’t use my *super secret* paint on the hand method with this one. We also made pumpkin stems and grass with finger prints. Name it “Your name here’s Pumpkin Patch” and call it art!

IMG_6142

5. Scrap Fabric Spider: I am a fabric hoarder by nature so this was an easy one for us to whip up quickly. To start I had Blondie pick the color construction paper she wanted and then I drew a large circle on it. The circle with be where the child glues down pieces of fabric to make up the body (or cephalothorax and abdomen) of the spider. For the gluing I smudged it around in sections and she placed the fabric in the glue spots.  Next, I cut thin strips of another pattern fabric to make up the legs. Did you know spiders have 8 legs and insects have 6? See and you thought you weren’t going to learn anything by reading blogs all day 😉 Once the legs are on, various eyes can be added. I let her choose the buttons and the number of eyes she wanted her spider to have. Have fun with this one!

 537242_10151910651712280_2142198430_n

6. Cotton Ball Ghost: This is a lot like the fabric spider except the material used is cotton balls. You can get creative with these and use white tissue paper, torn up coffee filters, or anything laying around your house that is white and will stay glued down. Just a simple ghost shape is drawn on the colored paper of choice and glue in sections for your kiddo to place their cotton ball. Add a spooky, happy, or silly face and you have instant ghost decor!

IMG_6138


Halloween Sensory Bin

Image
Halloween Sensory Bin

IMG_5807

She is ready to dig in!

We got this idea from a blog that focuses on learning through play  @ http://loveplayandlearn.com/.  They always have great ideas for keeping a toddler busy, happy, and learning. In this activity we used Halloween related goodies from home to create a holiday related Sensory Bin. Sensory Bins are great for appealing to a child’s senses because they are visually, textural, and audibly appealing.  They have a lot of developmental pluses too. For example, Fine motor skills are obtained from manipulating small objects and transferring objects from container to container.  I can see my Little working on a steady hand to pour rice from a larger container into a smaller medicine cup. Color matching, sorting, counting,  and pattern recognition also comes into play. It was fun to watch her discover new ways to incorporate different items into play. She was learning and didn’t even know it!

*Set up*

IMG_5806crop

First thing you will need is a storage bin to contain all your sensory goodies. Using these containers are great because they can be reused all month and kept neat by putting on the lid for storing on off days. Most of the items in the bins were purchased from the local dollar store to decorate for the holiday. The things I decided to include in our box were:

  • Orange and purple colored rice
  • Craft pom-pom balls in Halloween colors
  • Strips of scrap fabric in orange, black and white, and purple patterns.
  • Plastic spiders, bats, a skeleton, and creepy crawly bugs.
  • Halloween foam stickers with backing paper on.

You will also need small cups in various Halloween colors and measuring cups in different sizes.

IMG_5812 IMG_5820 IMG_5842 IMG_5866 IMG_5879 IMG_5869IMG_5896 IMG_5904 IMG_5908 IMG_5920

Blondie loved this project. I swear she played with it quietly for over an hour the first time we brought it out. She creatively made up different games with the goodies from burying and rescuing spiders to color matching in cups. She loved helping me dye the rice to start too. I love how imagination lead her in all directions with this project. When curls woke up from her nap she dove right in too. She was drawn more to the plastic toys than the colored rice, but she did enjoy the rice waterfalls we made. We will definitely enjoy other sensory bins in the near future. I’m really looking forward to a Christmas themed one 🙂

First!

Standard

We have a blog! I know this is supposed to be THE POST I look back on in exactly 1 year and ogle over how much we have grown as a blog and how much I’ve learned, so I better make this somewhat good…..Right? Okay so all good things begin with an Ice breaker….So here goes nothing. *Ahem* Me: Stay-at-home mom of 2, obsessive photo taker, obsessive Pinner and DIY’er (on Pinterest, incase you are out of the loop), Disneyland pass holder, semi-crunchy babywearer attachment parent. You: Adoring audience who will find everything I post to be entertaining enough that you return time and time again 😉 Just kidding, but I do hope you love this blog…….and return time and time again!

Well, now that I have summed myself up in one long run-on sentence let’s get to know each other! A lot of what you see here will be pins recreated (or attempted, let’s not kid ourselves) and crafty creations that I do with my Littles. It will also include our day to day  fun trips and give you (*the ADORING audience*) a behind the scenes of our semi-crunchy lifestyle.

Are you still here? Good! Ok let the fun begin 🙂 Allow me catch you up on Fall in our household and figure out how to use this blog 😉